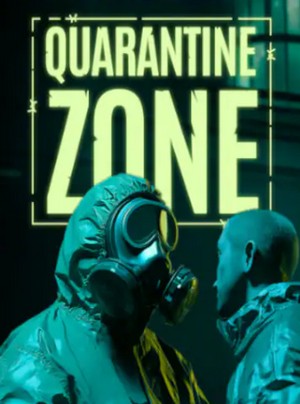
Before you start, make sure your brightness settings are about up to max, because this is one dark game; not dark like gloomy, but dark as is in you can hardly see anything.
Episode 1 - Blackout
Sequence 1: Wake Up
*NOTE: If you are on the 360, try to get through this without blinking for a free achievement. It's not that hard.*
You can press pause during this interactive scene if you want to adjust brightness now, and sadly there are no subtitles.
*NOTE: You can press Pause and check the progress of this episode by pressing over to bring up the "video player," and the little lines along the time bar are key moments. The small lines are events, and the big lines mark a new sequence. So if you look at the bar for this episode you'll see 4 more marks between the beginning and end, so there are 5 sequences.*
Just look around and blink when told, and you can keep blinking to see the scene unfold; you can basically just keep tapping the blink button at a casual pace. When it's time to get up, walk through the door, go left, then turn left again, and through the door on the right. Keep walking up, and keep blinking, and when you hit the next door you will lose your pal.
Now just follow the hallway to the end until you hit the scene, and you will move onto the next sequence.
Sequence 2: Vertigo
You can keep blinking out of habit if you wish, but you don't have to. You can keep it in the third person camera, but it's probably best you switch back to first person. Turn and get on top of the elevator for a scene.
After the scene, follow the walkway and then up the ladder. Now go over and send down the fire extinguishing line, and then rappel down. You need to just hop over the fans, and when you hit the spot where the fence is electrocuted, you need to move the hook with the line as far to the left as you can so the line gets caught and stays there, then keep going. When near the end of the rope, a guy will be calling to you, and then he is chased away. Come back up a bit, a door opens on the right, and then you need to jump in.
Sequence 3: Fire Escape
Turn around to the right and open the door. Listen to the lady babble on about her woman troubles, then go through the doorway. You can pick up some things on the ground and figure out how to swing them, but you just need to grab the table and pull or push it out of the way. It's dark, but look to the left and soon the fires will take the door. In the corner you will see the fire extinguisher, so go grab it. Enter first person and put out that fire, which will take a while, but you'll get it. Then go meet the guy, there is another extinguisher in here, and then enter third person view to use your extinguisher to smash the door open.
You can start putting out the fires in your path as the two are talking, then come back and listen. Now go into the hallway with them following, and you may need to smash the door if it closes, and just start putting out the flames in your way of going down the right path. When it's clear, drop your can and then get the jump button ready. Move toward the gap and press it to leap over. Turn around (using the quick turn), and watch as you lose your friends. Now look around on your side to find a gun off the dead cop. You can equip it by opening your jacket.
Use the gun to shoot the doorknob and go through the door. Just watch and you will luck out. Go into the next room and into the left side. There are two drawers to open, one under a TV and the other across the room. There are four items in total and when you have the spray, use it on one of your two wounds, or maybe more or less. Then the room starts to crack up. Stay on this side, and if you do by chance get on the other side, jump back over the gap. Head toward the back of the room when a guy opens the door, then just watch and wait.
Sequence 4: Don't Look Down!
Your friend will drop down a cable for you to climb up. Go up and then press over and the jump button to get on the ledge with him. Just stay behind him and hopefully you will grab the ledge. Then move to the right, but watch out for when a car is blown up from the street, so let it hit and then move. Keep going right and then pull yourself up. Now jump up to grab the ledge above you and then go left, and though none of the debris seems to hit you, just keep an eye out for the falling stuff. At the end and when the ledge is below you, drop down.
Grab the cable and then move up and then keep moving to the left to free the cable from the gargoyle. Then hop over to the ledge, and then jump up to keep shimmying along. This is when the brick wall starts to crumble, but don't panic, just keep going and then jump down when you are over the balcony. Go in through the doorway.
Now you have to figure out how to get up to the balcony above you. Go to the right side and look over the pit. On the left is a ledge you can use to get back out of the pit, and above it and toward the middle is a cable hanging down that you can jump to. This cable pulls a lift on the other side of the room. What you need to do is jump into the pit and grab the fire extinguisher, then drop it onto the lift. Now climb back up and jump to the cable which should toss the extinguisher onto the upper level.
Grab the extinguisher (I'm really getting tired of typing that word), and go put out the fire in the corner. Once it's out, drop it and then jump up and climb through the hole. Go out onto the balcony and start climbing the cable. All you can do is keep pulling yourself up, so keep going up even when you are falling all over the place, but once the end of the cable is above you, just climb up and jump onto the balcony with that lady.
Sequence 5: 24th Floor
Go inside and pick up the trash can and use it to smash open the door. Just go through and move to the pit to trigger the scene - so sad. Go grab the table and push it to the nearby wall. Jump on and then jump up. Shimmy to the left until you are past the wall and into the destroyed room. Climb up and then go to the corner to get near the switch. Pull it and then jump down and go up the slope.
Move foward and pick up a chair. Walk to the wall and then go directly up to the flame that is blowing down from the ceiling, not the one by the wall where you got the chairs. Go up and put the chair into the flame to light it. Look right and you'll see the path. You don't have forever, as when the chair is getting too hot you will toss it away. The path is a sorat "S" shape and when you get to the end, just jump toward the security guy. Scene and then end the episode. Be sure to save.
Episode 2 - Questions
Sequence 1: Unexpected Meeting
Okay, so she isn't gone. You need to beat her up. You could use the gun, but even better to use is a big spoon. You'll find them nearby and you can just swing them around and you'll eventually get her. You need to knock her down twice and then go drag her to a fire somewhere to get rid of her for good.
After the fight, go back to the corner of the room and jump to the cable. Climb up and some kind of swinging pendulum will start swinging through the hallway. Just jump over when it's goes by (big duh), and then hop down the hole. Grab the fire extinguisher and then smash open the door nearby to trigger a scene.
Sequence 2: Reception Hall
After the crash, try to pry open the doors. Then turn around and help her up, then you jump up. Just move to the other elevator lift and hop in, Sarah will jump in soon after. Go out and grab the flashlight and ammo box from the dead cop, then go right into a stairwell. All you can do is grab the items, then come back out and head up the hall, and have the gun equipped.
*NOTE: If your flashlight dies or gets dim, you should have a few batteries in your jacket.*
A few little critters will attack, so shoot them down or they'll mess you up. Once they are gone, go up and to the right to hit a door that you cannot open. Across from the door is a room with the switch, as well as a locker with some items; leave the baton there. Go to the power box and move the wires near each other to get the power on. A scene will trigger dumping a demon in the area. Pick up and use the baton to take him down, or use the one axe down by the fire. It could be best to use the axe because you want to light a chair and burn the demon after you knock him down.
Before you go through the door, you can grab the fire extinguisher and go back to the stairs and put out the fire to grab a mosquito spray. Then take the axe as you go over to the door. You need to input a code at the keypad. Just enter 943, which is somehow smaller blood splats to larger - opposite of what you would think. Leave the axe here by the door before you go down the steps.
You have to fight one more demon. Use the axe to pound him, then go get some fire when he's down and burn him. Then you can go down the steps and use the extinguisher here to put out the fire and go into the parking lot for a scene.
Sequence 3: Do I Know You?
After the scene, go to the car and shoot out or smash open the windows. Get in and then look around to see demons incoming. They'll pull you out, so get up and quickly run to the burning car to the right. Pick up the long metal pipe and use it to knock out the demons. When all three are out, pick up the baseball bat, set it on fire, and then go drop it over each demon to set them on fire; you could even try to burn them with the bat outright.
Once they are taken care of, get back in the car, turn on the lights, and then look around until the wire icon appears and enter the hotwire game. You need to switch until you have the green wires on top, them push them together. A gauge will pop up and when the line reaches green, press the gas button (the shoot button).
Sequence 4: Parking
Now you are driving (for better or worse). Move up and turn left until you fall through a hole. Drive around and up to the ramp to get back on the level you fell from. Up the ramp you'll see another ramp, so make sure all the debris is out of the way, then charge forward to jump over. Now quickly go around this corner and make your way straight ahead until you crash.
After, turn on the flashlight to see and then turn around and go into the utility room. Pick up the batteries on the shelf, then put one from your (not from a battery box of 8) and put it in your flashlight. Then drop a battery box (not a full one), and then grab the lighter off the shelf. Equip it and go over to the car to find the gas trail. Light the end of it and the car will blow, opening the path.
Go through and just head down to the end, you'll see a demon commit suicide. Head over to the corner where the fire is and light the chair on fire, then take it to the right and toss it to the wooden boards. As you wait there is a fissure that will come after you. All you can do is run and when the front is close to you, turn and run in another direction (I hope you know the use button is to run). Just run for a little while and then the fissure goes after someone that just appeared.
The boards should be mostly burnt, so just go through. There is a health spray by the dead woman, so pick it up (may need to temporarily drop something in your jacket), and use the spray to heal most of your wounds. Then head for the cab to trigger the scene. Get in the driver's seat and turn the key. Go through the door, then turn right and smash the next one.
Sequence 5: 59th Street
*NOTE: If you go into first person on the 360 and manage to do this scene, you get an achievement. It's not easy, so maybe come back to this later.*
Go around and up the ramp to hit the street. After the scene, speed forward. Take a left, then run forward and go right, the right, over the jump, then go left, but stay on the right side of the road to avoid cars. Keep avoiding the cars, go left around the building piece, keep going, go straight through the next piece of skyscraper, then stay to the left to go around the hole. Then avoid the burning car, hang a left, stay to the left as you zip down this street, try to go right so you can avoid the cracks in the road (you have a lot of time if you get stuck, and then zoom down this straight road.
Hang a right and get on the sidewalk, go through the swingset and take the road to hang another right. Down this straight road go through the platform of pipes and dodge the cars and when you get to the end go right. Inside the building go up the steps. Head straight, go over the pipes, and then ramp to a spectacular crash.
Episode 3 - Painful Answers
Sequence 1: Call 911
You can pick some things off of the dead guy. Go toward the bridge and you see an ambulance on the bridge. Turn around and help Sarah up, then go pick up the phone by Theo's body. After the call, press the PDA button. You can check the messages, documents, whatever, but then open up the phone tab. Input 911 and press the call button. After that, turn around and head toward Theo's body to trigger a scene.
Run around the bats and head for the bathroom up the hill. Go in and the door closes behind you. To the right is a room with a medical box. Grab the spray and the bandages. You get a message telling you what to do. Just press the "look at wounds" button to look at your gash and press the shoot button to wrap yourself up.
Now turn around and shoot down the wire by shooting the holding thing above the doorway. Go out to see the cracked wall. Open your jacket and let's make a bomb. You have explosive bottles and handkerchiefs in the locker. You can combine the two and set it on fire for a molotov, or just toss the bottle at the crack and shoot it, your choice.
*NOTE: Feel free to set combinations of items and set them to your quick menu for when you need them in combat. Such as the lighter and mosquito spray as a flamethrower, or ready another bomb.
Sequence 2: Down the Fissure
You can hang over the ledge and just drop down if you want. When you do reach this ledge, shoot the glass in the floor and drop down, then drop down another opening. Then look to the other side and jump across the gap, then another. Now go around the other side of the bus, maybe switch to third person view, and then jump up to the bus. Now, the back of the bus cannot fall, so just grab the body in the middle and drag it to the back, then quickly do the same for the third body toward the front. Now you can go to the front of the bus and open the door.
Step out and go forward and jump to the platform below. Look to the left and grab the chair in anticipation of the demons. Go set the chair aflame and chase down all five demons and burn them; the last one is big, but one touch of fire and he melts just the same. If your chair is tossed, use the lighter and one of your sprays as a flamethrower. After the big guy is gone, jump down to the lower platform.
*NOTE: If you have an explosive bottle, feel free to combine it with your gun to make fire bullets, which are just as effective against demons.*
Feel free to pick up this health spray (even dropping those glowsticks if you have batteries for the flashlight). Jump up to the ledge and shimmy over. When across the beam, hop down. Look up with the gun equipped and shoot the knob of the door to drop down a rope. Climb it to the top, then turn around and jump down to find ammo and a spray. Feel free to toss the mosquito sprays as the health sprays double as being usable for the flamethrower combo. Go back up.
Move forward and then look right and jump to a ledge. Shimmy all the way up and then tap the button to pull yourself up. Get in the car and get into the middle of the backseat, then push up to get in the passenger's seat. Open the glove box and swap out this new spray for one that isn't new. Now get in the driver's seat and get out. The car drops, then climb the rope to get into the sewer opening.
Hopefully you have a bottle. Equip it and the gun. Toss the bottle at the cocoon and shoot it to burn it; there are more bottles and some ammo in the pit, ammo on the right side. Jump down and then climb the ladder.
*NOTE: There is a goldfish in the water at the start of this sewer, under the cocoon. Aside from burning it for an achievement, shoot the goldfish for another. 360 only of course.*
Sequence 3: Filthy Waters
Just go forward until you hit a call - Edward is your name. Move forward after and an explosion will electrify the water. Go to the right and then hop over the water to get to the power box. Grab the wires and you'll see the two lights turn on and off. What you need to do is bring the wires close when the green light is on, but don't touch the wires. That should overload the power and clear the water.
Go through and you'll see more dangerous waters. Go to the right, kill the critter, and then get out the wires of the power box on the wall. The green light is more unpredictable, but just press one wire toward the other, and when you see the green light, bring the other wire close to overload the power. One little monster as you come back up.
Continue and you'll hit another pool of water. Seems like you're stuck, but jump to the right and you should grab the metal bar along the ceiling. Some steam valves will blow and cause some hazards for you, so just move and wait for the steam to subside before moving.
Now your goal is to move that wire out of the water so you can get to the door. Go into the side room and there are a ton of items on the shelves and in the locker. First you need to grab the paddle or a pipe and come to the water. Swing the paddle/pipe so that you can hook the wire onto the broken pipe along the railing. Once it is there, go back into the room and grab one of those canisters, or make a bomb. Come back into the water and use your explosive to blow the door open; if you go back to the room with the items, expect to fight a lone demon.
So go through the door and proceed until you hit a scene. This enemy is just a black goo on the ground. You need to equip your flashlight, hopefully with plenty of power, and aim it at the goo to make it retreat. First, get into the pit and at this end there is a light that keeps the goo away from this end. Now hold the flashlight at the goo until it backs up as far as it can go. You just keep holding it far away and move forward because the goo is not behind you, you just have to make sure you get it all. Just move it all to the other end and then jump to the opening on the right.
Now a puzzle that has a little bit of everything. First, go forward to the flame and turn the valve on the wall to turn off the gas. Feel free to get more items if you need them. Now come back to the water area and you'll see a nest for these things (called they are called Ratz). Again, I say combine the explosive bottle with the gun to make fire bullets, then shoot at the nest to take it out, then clear up the ratz (what a stupid name). Now go to where the nest is and pull the wire from the water. Then get in and go turn the valve to turn off the fire by the ladder; not sure what those little mounds are in the water, so avoid.
Go back to the room with all the items and grab a chair. Set it aflame with the leaking gas. You will use this chair to walk through the black goo as you walk to the ladder, be sure to drop the chair near the ladder so you can safely climb up.
Just go flip the switch on the power box and note that the wire will fall down. Go up to the fence and see the bats clinge to it. Now go back and turn the power back on, then pick up the wire and touch it to the fence to fry them. Open the door and go up the ladder.
Sequence 4: Stitches and Truth
Read a message you get from Crowley, if you want. Now, finally we are in Central Park. No, you are not held to just one path. You have many ways to get to the destination marker. But, there kinda is just one way you can go.
For one, you had better make some fire bullets now to fend off the bad guys that attack you at the start. Follow the road down and you'll see some humanz down there. But before you go down there, notice the cart near you. It's being held up by a body under the wheels, so move that body, drop it, and then quickly pull out your gun and fire and maybe you can get all three in one hit, otherwise just waste them with fire bullets. Take the steps to the bottom and go right to find a trash can with some items and ammo, then come to the right for more items and a few ratz.
Keep going down this right path and you'll hit a cart. Get in and drive it back the way you came. Follow the road and you will pass by some ratz and a car, and you can get the car if you work fast enough, and it may be best. Either way, keep going and you'll turn to go left, but down the way is a big enemy. Can't run him over, so either get out and fight him or just keep going and hope he jumps off, even try crashing; it's just best to go around him though. Then just keep going until you get close to the marker.
You need to get over this ramp, but there are more than just cars in your way. It say get out of the car and quickly hop over the debris and make your way to the car on the ramp. It will fall and at some point two big demons will come out of the ground. If you have an explosive bottle or health spray, get it ready and stay on the ramp. You're here for two reasons: one is to have moved the car on the ramp, and the other is so the enemies can move the debris on the ramp. When they move some of it, toss a bottle and blow it on them. If you only get one, run past him and look to the vending cart for another canister. Lure the enemy (or both) to this canister, stand back, and blow them both at once.
Now you have a few options. For one, there are two cars nearby, on the right side, and each has some items in the clove box. Use the health sprays to heal yourself and make sure all your sprays are fresh; and if you brought the car from before, don't forget to check it's clove box too.
*NOTE: Remember, use the lighter and a spray to set bodies on fire if there is no fire nearby.*
*NOTE: This next little section is completely optional. If you feel like it, just ramp to end the episode.*
Roots of Evil (3)
Secondly, notice that on your radar there is a weird marker to the right. You can go over there and fight three big demons at the gate, and there are some items behind the dead bodies on the bench, some explosives in the grass. Kill them and drive through the gate. There are enemies sprinkled all over, and a little bit of looking will likely lead to you finding some explosives and sprays near each. However, you don't have to go inside the building here, you can just go back and ramp off.
If you wish, go to the front of the big building and go in. Go down the steps and at the bottom are some items to grab. Go toward the doorway and look across the room to see the ratz nest. Shoot some fire bullets over there, or find another way to burn it. Then kill the ratz before going to face the first Root of Evil. It actually can't harm you, so just burn it with a flamethrower combo.
Notice the power box on the wall. Go to the opposite corner behind where the root was and press the button. Now come back to the box and get the blue wires in hand. You don't hold them too close, just barely move them toward each other and the circuit will be complete. The elevator will open so get in and take it up. Have a flamethrower ready.
Once you step out a fissure will attack. Hopefully you can just burn it with one good hit, you be sure to stay moving too. There is also a canister to blow up nearby and you can make your own bombs. Once the fissure is burnt, go to the right and burn the Root in the little hallway. There are items in the next room, and if you come back there is another room by the elevator that has more items; don't go out onto the balcony just yet.
Now go to the left of the elevator and there is just another Root in a corner. There is a locker near it, but that's pretty much it. Now go to the balcony, grab the water line, and rappel down to get out of this place. The building is all clear and nothing left for you to do here. Probably no cars nearby, so you'll have to run back, and there are two bridges on either side if you want to run back to the ambulance from here.
This little bit is in case you skipped on the roots.
As for the ramp, just make sure there is absolutely no debris at the bottom of the ramp. This is crucial because even the tiniest of debris can throw you off balance. Once stuff is cleared out, back up down the road a good ways, about a 100 yards or so, and then charge straight at the ramp. If you make it, you'll trigger the scene.
Episode 4 - Fight Back and Loss
Sequence 1: Ride to the Museum
Last chance to go for the roots. Just run up the marker at the building nearby and go inside through the doorway at the other side. Go in and there will be some rumblings, so get out either a flamethrower or fire bullets. This is called a Vampirz, and you just need to burn it. Grab a spray or two and then run back out and to the car. Just get in and turn it on.
*NOTE: Whoever made this section of the game was clearly on crack, or they just thought that having no sense to this segment made sense.*
Now is a very bad riding sequence. You can either go fast or hit something to shake the vampirz off, but don't think about crashing. As the ride starts, go straight down this road, and then you have to turn as the road ends, so go a bit down the way and then cut through the grass to get back on the main road. Blaze down and then hang a right.
Go forward and a car will go in front of you. Just follow it until you can pass it, and soon after you'll need to cut into the grass again. And again, quickly cut back to the left to get back on the main road. Just follow it and through the rubble, and hopefully you can see through the smoke coming out of your engine (maybe switch to first person). And then you're on the home stretch. Just take it easy, avoid the curbs and anything that can mess you up, and when you get to the falling tree you have survived.
Sequence 2: The Nest
Well, so much for surviving. This is a boss, I guess, but it's not that hard. You need to toss four explosives into the base of this thing and blow them up with a bullet; maybe you could tape up four bottles and toss them at once, but I wouldn't advise that. For your protection there are just two walls to hide behind on either side from where you start. You can't stay here forever, but you can heal yourself while hiding here.
More importantly there is an almost endless supply of explosive bottles for you to pick up. The plan is to have one, equip it and the gun, then run to the left side of the base, get close but not beyond the columns, toss the bottle and hold the button to enter slow mo, and then blast it. There is a second-long mini scene and then you need to quickly run back to your cover as the batz monster will start throwing more debris at you. Just repeat this three more times and it will go up in flame.
Just go up and during the scene you will read a message. Now you can free-roam a bit more. Get in a car and head toward the marker on the radar. After getting pegged by a few enemies, if you follow the road you should eventually see another static spot on the radar.
Roots of Evil (2)
Go to the right side of the Lakehouse with fire bullets in the gun. There are four, quick humanz here, so take them out. Now go in and burn the two roots, and you get another message about your improving spectral vision. Collect any items as you exit the way you came. Reunite with Sarah and get in a car to continue on.
Sequence 3: The Kidnapping
Now head for the destination marker. You'll see that you need to jump a gap, but there is no ramp. Turn around and you'll see a tow truck. Get it and drive it toward the gap, the open part; Sarah tells you where to put it (yeah, I wish). Then get out and press the button on the side, and then go to the back and shoot off the two locks to let down the ramp. Head for a car and on the way you will lose Sarah. After she is gone, quickly go to a car and head up the ramp before the enemies get you.
Sequence 4: Fight the Living Scar
Go shoot the lock off and go through the gate. Have a molotov, flamethrower, or some fire bullets in the gun. This fissure is much faster than the last, so you'll need to be quick. You can light a molotov and drop it and hope the fissure runs into it, that is an option. Otherwise you'll need to aim quick and burn thing.
*NOTE: Maybe try taking cover on the playground.*
After you take it out, go to the pipes in the fissure and jump over. Go to the power box and either shoot or knock off the metal cover with the bat nearby. Grab the wires and bring the red ones close until the power is on. Pick up the call and then get on the lift when it arrives. Press the button to go up one level. Get out and go into the closet on the right for some health and explosive bottles. Use them to make some fire bullets. Now come out and head toward the other door for a fissure to come out. You can shoot it with fire bullets and hopefully hit it quickly.
*NOTE: You can get back on the lift and go up one more level, but it's only got a spray bottle if you even need it.*
Before you go through the door, go pick up the fire extinguisher in the closet and bring it with you. Use it to put out the fire in the hallway and then hit a call. After, you can turn around for some items by a little kitchen area, make sure you are full up on explosive bottles, then head down the hall. When you turn the corner you will run into a big demon, bigger than the big ones from before. You need to use the "toss the bottle and shoot it" trick, but then you have to toss another to quickly burn the body; you have like five seconds to burn the body. You can wait behind the table for the fire to go out, or go back around the corner, and this may be best as there is another one that appears and you can get both at once. You should run up close, toss a bottle, hit it, then toss another once you've confirmed they are down. If you for any reason run low on explosives, there are more at the kitchen, even some in a cupboard.
Once you take them out, go back to the kitchen area and grab the gas tank. You need this to blow off the door at the end of the hall, but maybe you can just drop it by the door and it will knock it open. Either way, go through the door and you see what has become of Sarah.
Copyright 2008 Brad Russell










![BioMutant: SaveGame (NG+, 53 lvl, 100%) [GoG]](/_ld/100/60344276.jpg)
![Symphony of the Serpent: Savegame 100% [56021]](/_ld/149/12249511.jpg)

